Most bodyweight-Only workouts for fat loss give you one routine and leave you there. That works for a few weeks. Then the squats get easy, the workout stops challenging you, and you either plateau or quit. This guide takes a different approach. Instead of one fixed circuit, it gives you a progression system: five movement patterns, four difficulty levels for each, clear rules for when to move up, and a 12-week roadmap that grows with you.
You don’t need weights, bands, or a gym. You need a bit of floor space, a sturdy counter or table, and a willingness to start easier than you think you should.
One honest note before we begin: no workout can guarantee fat loss. Body-fat change depends on your overall eating pattern, daily activity, sleep, stress, and individual factors. What this plan does is help you build strength, stay consistent, and keep progressing, which are the things a workout can control.
What Makes This Plan Different
This article is about how to progress, not about a single session. It is not a timed full-body circuit, not a cardio plan, and not a nutrition guide. It focuses on one question: how does a complete beginner get stronger using only their own body weight, week after week, without equipment?
If you want a cardio-focused option, you’ll find a link to one later. Here, the goal is strength-based progress you can measure.
Why Progression Matters More Than the Exercises
Current U.S. guidance recommends that adults do muscle-strengthening activity on at least two days per week, in addition to aerobic activity (CDC adult activity overview). Bodyweight exercises such as push-ups and squats count toward that (CDC: what counts as physical activity).
The catch is that your body adapts. If you do the same 10 squats at the same speed every week, your muscles have little reason to keep improving. Progression means giving them a slightly harder job over time. The American College of Sports Medicine (ACSM) emphasizes consistency, individualization, and gradual progression in its resistance-training guidance, and recognizes bodyweight and home-based training as practical options (ACSM resistance training plan).
With free weights, you progress by adding load. With bodyweight, you change the leverage, range, tempo, or balance demand of an exercise. That is what the ladders below are built on.
The Five Movement Patterns
A balanced full-body session doesn’t need dozens of exercises. It needs one exercise from each of five patterns:
| Pattern | What it trains | Starter exercise |
|---|---|---|
| Squat | Thighs, glutes | Chair squat |
| Hinge | Glutes, back of thighs | Glute bridge |
| Push | Chest, shoulders, triceps | Wall push-up |
| Single-leg | Legs, glutes, balance | Supported reverse lunge |
| Core | Abs, shoulders, trunk stability | Counter plank |
Each pattern has four levels. You begin at the level where you can complete the target reps with good control, then move up when you’ve earned it.
The Progression Ladders
Squat Ladder
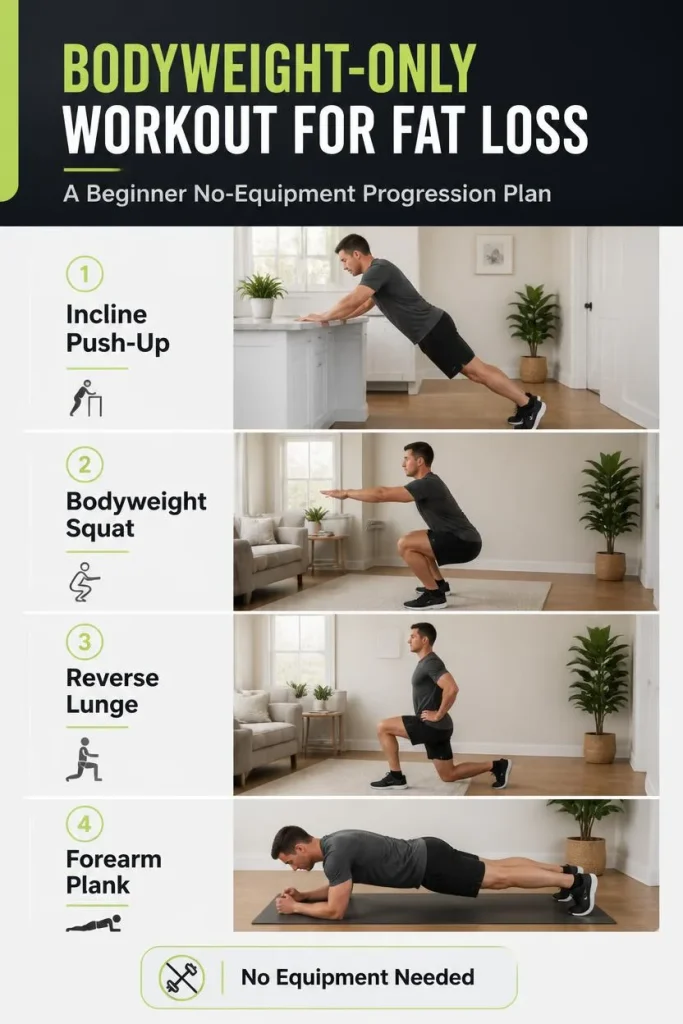
- Level 1: Chair squat. Sit down to a sturdy chair and stand up, lightly touching the seat.
- Level 2: Bodyweight squat. Same movement without the chair, going as low as you can control.
- Level 3: Slow-lowering squat. Take about three seconds to lower, then stand up normally.
- Level 4: Pause squat. Lower for three seconds, pause for two at the bottom, then stand.
Hinge Ladder
- Level 1: Glute bridge. Lie on your back with knees bent, lift your hips, lower with control.
- Level 2: Paused bridge. Hold the top position for three seconds and squeeze your glutes.
- Level 3: Marching bridge. Hold the bridge and lift one foot a few inches, then the other, keeping hips level.
- Level 4: Single-leg bridge. Extend one leg and lift with the other.
Push Ladder
- Level 1: Wall push-up. Hands on a wall, body in a straight line, bend and press.
- Level 2: Counter push-up. Hands on a sturdy counter or table edge.
- Level 3: Low-incline push-up. Hands on a lower stable surface, such as a stair step.
- Level 4: Floor push-up. Full push-up on the floor, or on your knees if you need an in-between step.
Single-Leg Ladder
- Level 1: Supported reverse lunge. Hold a wall or counter and step one foot back.
- Level 2: Reverse lunge. Same movement with no support.
- Level 3: Slow-lowering reverse lunge. Take three seconds to lower.
- Level 4: Paused split squat. Hold a staggered stance and pause briefly at the bottom of each rep.
Core Ladder
- Level 1: Counter plank. Forearms or hands on a counter, body in one line.
- Level 2: Dead bug. Lie on your back, arms up and knees bent at 90 degrees. Lower the opposite arm and leg slowly, then switch.
- Level 3: Forearm plank. Hold on the floor with elbows under shoulders.
- Level 4: Plank with shoulder taps. From a high plank, tap each shoulder alternately without letting your hips swing.
A few safety points apply to every ladder. Pain in a joint is a reason to stop or go back a level, but muscle effort and mild tiredness are normal. If a variation makes you hold your breath or lose your form, it is too hard for today.
The Level-Up Rule
Here is the simple system that decides when to move up.
Step 1: Use a rep range. For squats, hinges, pushes, and single-leg work, aim for 8 to 12 reps per set. For core work, aim for 20 to 40 seconds per set.
Step 2: Stop with reps in reserve. End each set when you could do about two more good reps. That is hard enough to count, but safe enough to repeat.
Step 3: Earn the level-up. When you reach the top of the range (12 reps or 40 seconds) on all your sets, with about two reps still in reserve, for two sessions in a row, move up one level.
Step 4: Reset. When you move up, expect to drop back to the low end of the range (around 8 reps). That’s normal. It means the exercise is now the right difficulty.
Step 5: Don’t rush. If a level isn’t earned yet, add a rep, slow your tempo, or take a longer pause instead. Progress doesn’t always mean a new exercise.
This rule is deliberately boring, and that’s the point. It removes guesswork and keeps you from jumping to hard variations before you’re ready.
The Weekly Session Template
Every session uses the same simple structure, so you never have to design a workout from scratch.
Warm-up (3 minutes): Easy marching, arm circles, hip circles, and a few slow bodyweight squats to the depth you’ll use.
Main work: One exercise from each pattern, in this order:
- Squat
- Push
- Hinge
- Single-leg
- Core
Do each exercise for its set, rest 45 to 60 seconds, and move on. Complete the circuit 2 times in the early weeks and 3 times in later weeks.
Cool-down (2 minutes): Slow breathing and gentle stretches for your thighs, hips, and chest.
With two rounds, a session takes roughly 15 to 18 minutes including warm-up and cool-down. With three rounds, expect about 25 minutes. The structure stays the same either way, which makes the habit easy to maintain.
Your 12-Week Roadmap
Train three non-consecutive days per week once you’re past the first two weeks. A rest day or an easy walk between sessions helps you recover.
| Weeks | Phase | Sessions per week | Rounds | What to focus on |
|---|---|---|---|---|
| 1 to 2 | Learn | 2 | 2 | Start at Level 1 (or Level 2 if Level 1 feels too easy). Focus on form and breathing. |
| 3 to 4 | Foundation | 3 | 2 | Build reps toward the top of each range. Week 4 is a check-in week. |
| 5 to 8 | Build | 3 | 2 to 3 | Apply the level-up rule. Add a third round when two feel manageable. Week 8 is a check-in week. |
| 9 to 12 | Challenge | 3 | 3 | Aim for Level 3 or 4 in at least two patterns. Slow the tempo for extra challenge. Week 12 is a check-in week. |
What a Check-In Week Looks Like
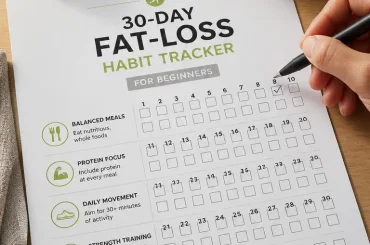
At weeks 4, 8, and 12, repeat the same session without pushing for more. Then record:
- The level you are using for each of the five patterns
- Your best set of reps or hold time for each
- How hard the session felt (easy, medium, or hard)
- How well you recovered the next day
These notes are more valuable than a number on a scale, because they show your strength actually changing.
Making Fat Loss Realistic
This is where expectations matter. Physical activity increases the energy your body uses and supports your overall health, but CDC guidance notes that weight loss generally depends heavily on reducing calorie intake, while regular activity plays an important role in maintaining weight loss and improving health (CDC: physical activity and your weight and health).
In practice, that means a Bodyweight-Only Workout for Fat Loss plan works best as one piece of a larger picture:
- Strength training helps you build or hold onto strength while your body weight changes.
- Daily movement, like walking or taking the stairs, adds to your total activity without needing a workout.
- Eating habits are usually the biggest lever for changing body weight, so aim for sustainable changes rather than extreme restriction. Our guide to losing weight without extreme dieting covers this in practical terms.
- Sleep and recovery affect how consistently you can train.
Avoid the idea of “spot reduction.” Core exercises strengthen your abdominal muscles, but they don’t selectively remove fat from your midsection. Fat loss happens across the whole body, and where it comes off first varies from person to person.
Fitting It Into Your Week
A simple pattern for most beginners looks like this:
| Day | Activity |
|---|---|
| Monday | Strength session |
| Tuesday | Walk or easy movement |
| Wednesday | Strength session |
| Thursday | Rest or light activity |
| Friday | Strength session |
| Saturday | Longer walk or recreational activity |
| Sunday | Rest |
If you’d like help deciding how many days suit your schedule, see how often beginners should work out at home. Remember that you don’t have to hit a perfect schedule. Two consistent sessions per week still count as meeting the muscle-strengthening guideline.
Whenever you’re ready to add heart-pumping work on your off days, the beginner cardio workout with no running pairs well with this plan without adding joint stress.
Track Progress Beyond the Scale
Body weight can fluctuate for reasons unrelated to fat, such as water, food timing, and hormones. These markers tell a clearer story:
- Level progress: Moving from a chair squat to a bodyweight squat is real, measurable strength.
- Rep and hold progress: Going from 8 reps to 12 on the same exercise.
- Recovery: Feeling less sore or tired after the same workout.
- Daily function: Climbing stairs more easily or carrying groceries with less effort.
- Consistency: The number of sessions you completed each month.
If you take body measurements or photos, do it every four weeks rather than daily.
Common Mistakes to Avoid
Skipping levels. Jumping straight to floor push-ups or pause squats before you can control the easier versions leads to poor form and sometimes pain.
Chasing speed. Rushing through reps reduces the work your muscles do. Slower, controlled reps are harder and safer.
Doing too much too soon. Three rounds, five days a week, in the first fortnight is a quick route to soreness and dropout.
Never progressing. Staying at Level 1 for months means your body has no new reason to adapt.
Changing everything at once. Adjust one variable at a time, such as reps, tempo, or level, so you can tell what works.
Ignoring recovery. Rest days are when your body adapts to the training you’ve done.
Safety Notes
Start every session with the warm-up. Use controlled movements, keep water nearby, and stop if you feel sharp or unusual pain, dizziness, chest pain, or severe shortness of breath. If you’ve been inactive for a long time, have a chronic health condition, or plan to begin vigorous exercise, talk to a healthcare professional first. A hard day doesn’t mean you should push through a warning sign.
Frequently Asked Questions
Can bodyweight exercises really help with fat loss?
They can support it as part of a larger plan. Bodyweight training builds strength and adds to your physical activity, but fat loss depends on your overall energy balance and lifestyle, not on a single workout type.
Do I need any equipment?
No. A wall, a sturdy counter or table, a chair, and a stair step are enough for every level in this plan.
How many days a week should I train?
Two to three non-consecutive days is a practical range for beginners. Two days meets the minimum muscle-strengthening guidance, and three gives you more opportunities to progress.
What if I can’t do a Level 1 exercise yet?
Reduce the range of motion, add support, or do fewer reps. If something hurts, skip it for now and consider speaking with a healthcare professional or qualified trainer about alternatives.
What if I plateau?
Check the basics first: sleep, food, stress, and whether you’ve actually been applying the level-up rule. Then try slowing your tempo, adding a pause, or adding a round before moving up a level.
How is this different from a regular beginner workout?
A regular routine tells you what to do. This plan tells you how to keep making it harder in a controlled way, so you can still progress in month three without equipment.
Can I switch to weights later?
Absolutely. Once Level 4 feels easy across most patterns, you can add resistance bands or dumbbells while keeping the same five-pattern structure.
The Bottom Line
You don’t need a gym, a long workout, or fancy equipment to get stronger. You need a simple structure, a way to make exercises harder over time, and patience with the process. Pick the level of each pattern that you can control today, follow the level-up rule, and let the 12 weeks do the work.
Think of fat loss as the outcome of several habits working together: regular strength training, daily movement, sustainable eating, and enough sleep. This plan covers the first habit. A routine you can repeat and progress is worth far more than a hard one you abandon.
Sources and Further Reading
- CDC: Adult Activity, An Overview covers aerobic and muscle-strengthening recommendations for adults.
- ACSM: Creating an Effective Resistance Training Plan emphasizes consistency, individualization, and gradual progression, including bodyweight and home-based options.
- Physical Activity Guidelines for Americans (ODPHP) provides the federal guidelines for adult physical activity.