Most home workout routines are built around exercises you can see yourself doing in a mirror: push-ups, squats, planks, lunges. Pulling exercises — the ones that work your back — get left out far more often, not because they matter less, but because they’re harder to picture without a gym.
That gap matters. Your back muscles balance out everything your chest, shoulders, and front-of-body muscles do, and they’re central to posture, spinal support, and everyday strength like carrying groceries or picking things up off the floor. A home routine that’s all push and no pull eventually catches up with you, usually as rounded shoulders, a tight chest, or a nagging lower-back ache.
This guide (How to Train Your Back at Home) fixes that gap. You’ll get real back exercises that work with no equipment, with resistance bands, and with a pull-up bar, organized into a progression you can follow for weeks rather than a random list of moves.
Quick Answer
You don’t need a cable row machine or a lat pulldown stack to train your back effectively at home. Bodyweight rows using a sturdy table or towel, resistance band rows and pull-aparts, and a doorway pull-up bar (if you have one) cover the full range of back-training needs — upper back, lats, and lower back — for a beginner through intermediate lifter. The key is prioritizing pulling movements at least twice a week, since they’re the ones most home routines unintentionally skip.
Why Pulling Movements Get Left Out of Home Workouts
Push-ups, squats, and planks need nothing but floor space, so they naturally become the backbone of bodyweight routines. Pulling movements are different: a true bodyweight row needs something to pull against — a bar, a table edge, a sturdy strap — and that single requirement is enough to make people skip the category entirely.
The result, according to U.S. government survey data on muscle-strengthening activity, is a widespread pattern: most adults who do strength train focus heavily on the arms, abdomen, and legs, while the back and other muscle groups get comparatively little attention (CDC HealthStyles survey data on muscle-strengthening activity). Current federal physical activity guidelines recommend muscle-strengthening activity at least two days a week that works all the major muscle groups — not just the ones that are easiest to train without equipment (CDC Physical Activity Guidelines fact sheet for adults).
If you’ve been following a structured plan like FitVibe’s beginner workout routines and noticed your sessions lean heavily on pushing and leg work, this is likely why. Adding a dedicated back-training component doesn’t need to replace anything — it just needs 10-15 extra minutes, two or three times a week.
The Back Muscles You’re Actually Training
You don’t need anatomy-course detail to train your back well, but knowing roughly what you’re working helps you understand why different exercises matter.
- Upper back and rear shoulders (rhomboids, rear deltoids, trapezius): These pull your shoulder blades back and down. Weak upper-back muscles are a major contributor to the rounded-shoulder posture common with desk work.
- Lats (latissimus dorsi): The large, wing-shaped muscles that run from your upper arms down to your mid-back. They do most of the work in pull-ups and rowing movements, and they contribute to pulling strength in everyday tasks.
- Lower back (erector spinae): These muscles run along your spine and keep your torso upright. They’re worked indirectly in rows and directly in hip-hinge and back-extension movements.
A well-rounded home back routine touches all three, not just the muscles that show the most visible pump.
Equipment Options for Home Back Training
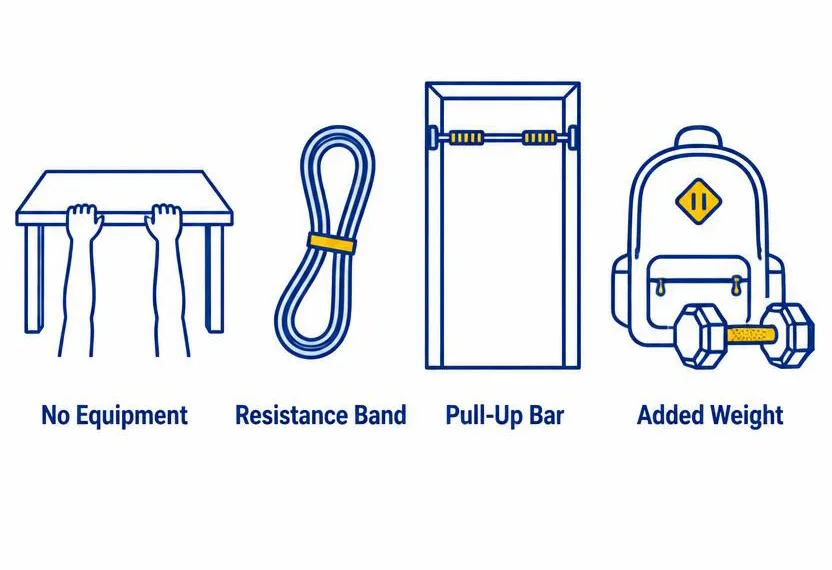
You don’t need all of these. Pick based on what you already have, and know that you can train your back effectively at every level below.
| Equipment | Best For | Cost | Difficulty to Start | Limitations |
|---|---|---|---|---|
| No equipment (table, floor, wall) | Absolute beginners, travel, no budget | Free | Easy | Limited long-term load progression |
| Resistance bands | Beginners through intermediate, home or travel | Low ($10-$30) | Easy | Resistance curve feels different from weights; bands wear out over time |
| Doorway pull-up bar | Intermediate lifters ready to progress beyond rows | Low-moderate ($20-$50) | Moderate (requires some baseline pulling strength) | Needs a sturdy door frame; not all apartments allow installation |
| Suitcase, backpack, or light dumbbells | Adding light load to rows once bodyweight/bands feel easy | Free-low | Easy | Awkward to load heavier than ~20-25 lbs safely |
If you’re choosing your first piece of home equipment specifically for back training, a resistance band set is the most versatile starting point — it covers rows, pull-aparts, and assisted pulling work in one inexpensive tool.
Bodyweight Back Exercises (No Equipment Needed)
These require nothing but floor space and, for one exercise, a sturdy table.
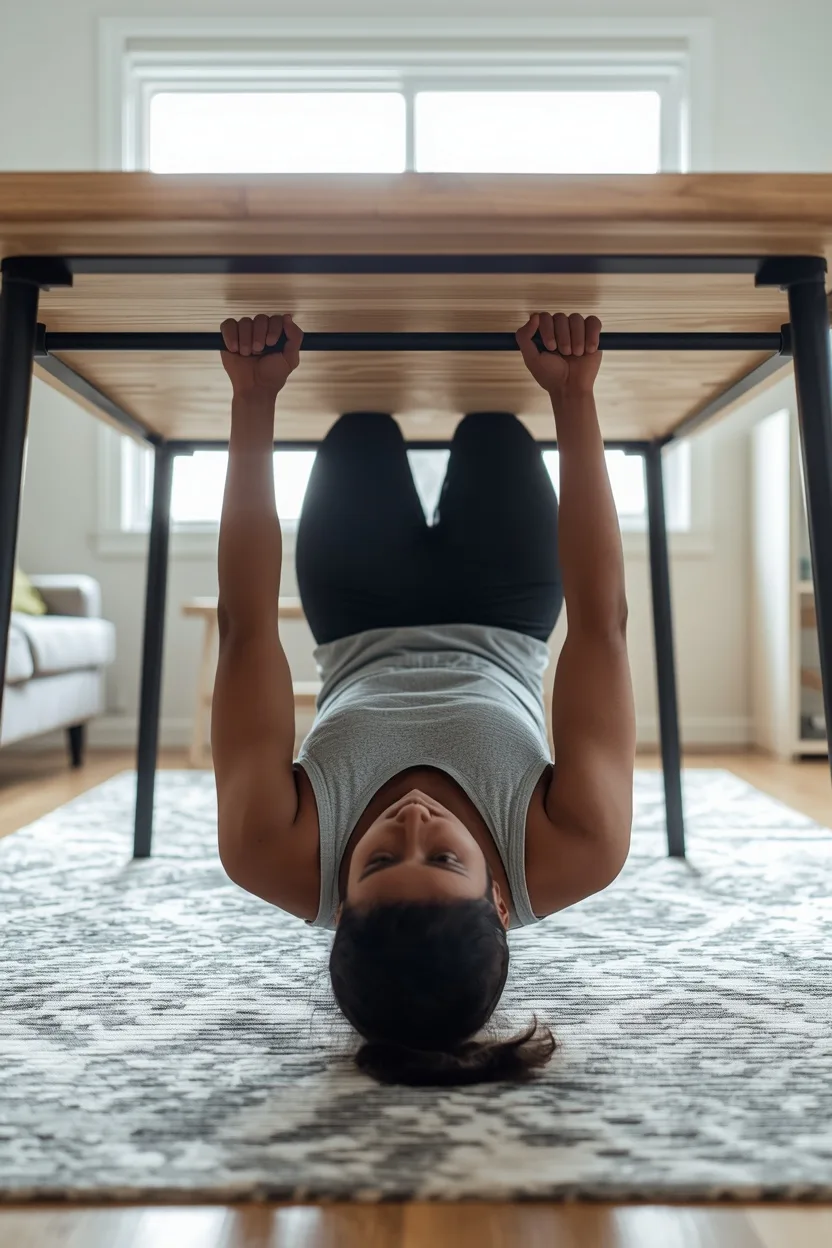
1. Table (or Bar) Inverted Row
This is the closest bodyweight equivalent to a cable row and the single best no-equipment back exercise available.
How to do it:
- Find a sturdy table, low bar, or the underside of a secured desk that can support your bodyweight.
- Lie underneath it, grip the edge with both hands, and position your body in a straight line from head to heels, feet on the floor.
- Pull your chest toward the table edge, squeezing your shoulder blades together at the top.
- Lower under control until your arms are straight.
Beginner modification: Bend your knees and keep your feet closer to your body to reduce the percentage of bodyweight you’re pulling. The more vertical your body, the easier the row.
Progression: Straighten your legs and walk your feet further out to increase the angle and the resistance.
2. Reverse Snow Angels (Floor Y-T-W Raises)
A light but effective exercise for the upper back and rear shoulders, useful as a warm-up or a finisher.
How to do it:
- Lie face-down with arms extended overhead in a “Y” shape, thumbs pointing up.
- Lift your arms and chest slightly off the floor, squeezing your upper back.
- Lower with control. Repeat in a “T” position (arms out to the sides) and a “W” position (elbows bent, pulling back like you’re starting a lawnmower).
Sets/reps for beginners: 2 sets of 10-12 reps per position, 2-3 times per week.
3. Superman Hold (Lower Back)
Targets the erector spinae muscles that support your spine.
How to do it:
- Lie face-down, arms extended in front of you.
- Simultaneously lift your arms, chest, and legs a few inches off the floor.
- Hold for 2-3 seconds, then lower with control.
Beginner modification: Lift only your upper body first, keeping legs on the floor, until your lower back has built some baseline strength.
Resistance Band Back Exercises
Bands are the most practical upgrade from bodyweight-only training because they let you adjust resistance precisely and train the back through a fuller range of motion than most bodyweight moves allow.
4. Seated or Standing Band Row
How to do it:
- Loop the band around a sturdy anchor point (a doorway anchor, a closed door with the band looped at the hinge side, or your feet if seated on the floor).
- Hold the handles or ends with arms extended, light tension on the band.
- Pull your elbows straight back, squeezing your shoulder blades together, keeping your torso upright.
- Return slowly to the start.
Common error: Using momentum from the torso instead of the arms and back. Keep your core braced and let your shoulder blades do the work.
5. Band Pull-Apart
A simple but highly effective exercise for upper-back and rear-shoulder strength, often underrated because it looks too easy.
How to do it:
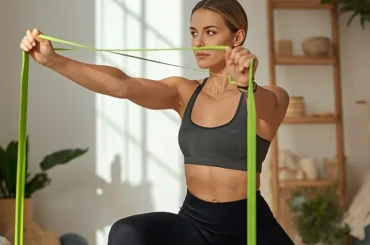
- Hold a light-to-medium band with both hands at shoulder height, arms extended in front of you.
- Pull the band apart by moving your arms out to the sides, keeping them straight, until the band touches your chest.
- Return with control.
Sets/reps: 2-3 sets of 12-15 reps. This exercise works well as a daily “posture snack” even on non-training days.
6. Band Lat Pulldown
How to do it:
- Anchor the band to a high point (a sturdy hook, the top of a door) or hold it overhead with arms extended.
- Pull the band down and slightly out to the sides, driving your elbows down toward your ribs.
- Control the return to full arm extension.
This exercise mimics the lat pulldown machine and is a useful bridge exercise for anyone working toward their first pull-up.
Pull-Up Bar Progression
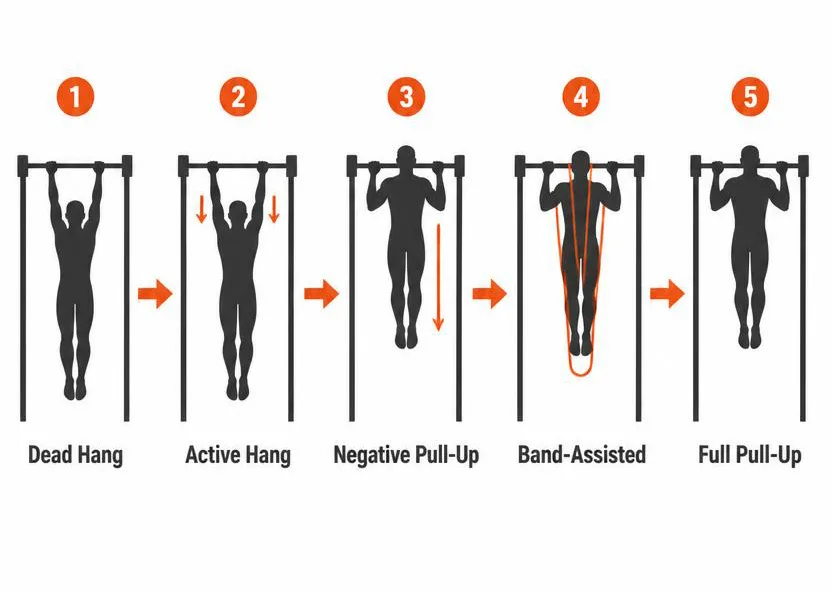
A doorway pull-up bar is the single highest-ceiling piece of home back equipment, but it’s also the one most beginners approach wrong — jumping straight to full pull-up attempts and getting discouraged. A structured progression works much better.
| Stage | Exercise | Goal Before Progressing |
|---|---|---|
| 1 | Dead hang | Hold for 20-30 seconds with relaxed shoulders |
| 2 | Active hang (shoulder blades engaged, slight pull) | Hold for 15-20 seconds |
| 3 | Negative pull-ups (jump or step to top position, lower slowly) | Control a 5-second lowering phase for 3-5 reps |
| 4 | Band-assisted pull-ups | Complete 5-8 reps with a lighter band over several weeks |
| 5 | Full bodyweight pull-up | 1 clean rep, then build toward 3-5 |
Move to the next stage only when the current one feels controlled, not just barely survivable. This mirrors the same progressive-overload principle used across strength training generally — small, consistent increases in demand rather than large jumps (what progressive overload looks like in practice).
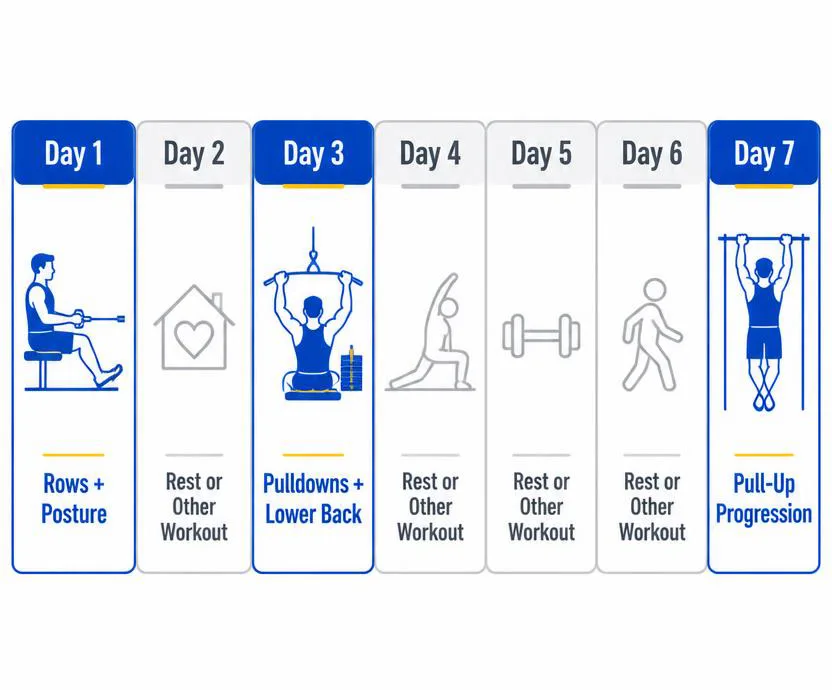
Sample Weekly Back Training Add-On
This isn’t a full workout plan — it’s designed to slot into an existing routine, like the one in FitVibe’s guide to building a healthy routine on a busy schedule, without requiring extra gym time.
| Day | Focus | Example Exercises | Time Needed |
|---|---|---|---|
| Day 1 | Rows + posture work | Table rows or band rows, band pull-aparts | 10-12 minutes |
| Day 2 | Rest or other training | — | — |
| Day 3 | Pulldowns + lower back | Band lat pulldowns, superman holds | 10-12 minutes |
| Day 4-6 | Rest, cardio, or other training | — | — |
| Day 7 | Pull-up bar progression (if available) | Dead hangs, negatives, or assisted pull-ups | 8-10 minutes |
Two focused sessions a week is enough to meet general muscle-strengthening recommendations for the back specifically, and a third session adds faster progress if your schedule allows it.
A Four-Week Example Progression
| Week | Table/Band Rows | Band Pull-Aparts | Pull-Up Progression |
|---|---|---|---|
| 1 | 2 sets x 8-10 reps | 2 sets x 12 reps | Dead hangs, 3 x 15-20 sec |
| 2 | 2 sets x 10-12 reps | 2 sets x 15 reps | Active hangs, 3 x 15-20 sec |
| 3 | 3 sets x 10-12 reps | 3 sets x 15 reps | Negative pull-ups, 3 x 3-5 reps |
| 4 | 3 sets x 12 reps, harder angle | 3 sets x 15 reps | Negative pull-ups, 3 x 5 reps, slower tempo |
This kind of gradual build applies whether your goal is general strength or supporting a broader fat-loss and muscle-retention plan, since resistance training across all major muscle groups — not just the ones that are easy to see in a mirror — is part of what preserves muscle during a calorie deficit.
Common Mistakes in Home Back Training
| Mistake | Why It’s a Problem | Better Approach |
|---|---|---|
| Skipping back work entirely | Leads to muscle imbalance and can contribute to rounded-shoulder posture | Schedule it specifically — it won’t happen by accident |
| Using momentum instead of control on rows | Reduces how much the back muscles actually do the work | Slow down the tempo, especially the lowering phase |
| Jumping straight to full pull-ups | Common source of frustration and early quitting | Follow the hang-to-negative-to-assisted progression above |
| Overarching the lower back on rows | Can strain the lower back instead of working the target muscles | Keep a slight brace in your core and avoid excessive arching |
| Training back only once a month or sporadically | Inconsistent stimulus limits progress | Aim for at least two sessions a week, even if short |
Before-You-Start Checklist
- [ ] Choose your starting equipment level (bodyweight, bands, or bar)
- [ ] Confirm any anchor point (table, door, bar) is stable enough to bear weight safely
- [ ] Pick two fixed days per week for back-focused work
- [ ] Start with the bodyweight or band versions even if you own a pull-up bar
- [ ] Track reps and how controlled each set feels, not just whether you finished it
- [ ] Reassess your progression stage every 1-2 weeks
Frequently Asked Questions
How often should I train my back at home? Two sessions a week is enough to see steady improvement and meets general guidance for working all major muscle groups regularly. Three sessions can speed progress if your schedule allows it, as long as you’re recovering well between them.
Can I build a strong back with just resistance bands? Yes, especially at the beginner-to-intermediate level. Bands allow a full range of motion and adjustable resistance, which covers most of what a beginner needs. Progress to a pull-up bar when band exercises start to feel too easy even at the band’s highest resistance.
I can’t do a pull-up at all. Where do I start? Start with dead hangs and active hangs to build grip and shoulder strength, then move to negative pull-ups (lowering slowly from the top position). Most beginners need several weeks of consistent practice before attempting a full rep, and that’s a normal timeline, not a sign of doing something wrong.
Will training my back help my posture? A stronger upper back and improved pulling strength can help counterbalance the forward-shoulder posture common with desk work and phone use, but posture is also influenced by habits throughout the day — not training alone. Combine back training with periodic movement breaks for the best results.
Do I need a doorway pull-up bar, or are bands enough? Bands alone can take you a long way. A pull-up bar is a useful next step once band rows and pulldowns feel consistently easy, not a requirement from day one.
My lower back feels tight after these exercises. Is that normal? Mild muscle fatigue after lower-back work like superman holds is common, especially early on. Sharp, shooting, or worsening pain is not — stop the exercise and consider checking in with a doctor or physical therapist if pain persists or limits daily movement.
Safety Notes
Stop any exercise immediately if you experience sharp pain, dizziness, or unusual shortness of breath. If you have an existing back injury, chronic back pain, or a diagnosed spinal condition, check with a doctor or physical therapist before starting a new back-training routine — some of these exercises involve spinal loading that may need to be modified for your specific situation. For anyone new to resistance training generally, reviewing form basics before adding load is worth the extra few minutes, since most back-training mistakes come from poor control rather than the exercises themselves.
Conclusion
A home workout routine without dedicated back training is missing one of its most important components, not because pulling exercises are flashy, but because they balance out everything else you’re doing and support posture and everyday strength. You don’t need a full home gym to fix that gap — a sturdy table, a resistance band, or a doorway pull-up bar each cover real, effective training on their own.
Start with the bodyweight and band exercises above, commit to two sessions a week, and move through the pull-up progression only when each stage feels genuinely controlled. That consistency, more than any single exercise, is what builds a stronger back over time.
Save This Guide: Quick Reference
- No equipment: Table inverted rows, reverse snow angels, superman holds
- Resistance bands: Band rows, band pull-aparts, band lat pulldowns
- Pull-up bar: Dead hang → active hang → negative pull-ups → assisted → full pull-up
- Minimum frequency: 2 sessions/week, 10-15 minutes each
- Progression rule: Move to the next stage only when the current one feels controlled, not just completed
- Watch for: Sharp or worsening pain — stop and check with a professional if it occurs