At some point, almost everyone training at home hits the same wall: the dumbbells you have are no longer challenging, but buying a heavier set isn’t realistic right now. The instinct is to assume progress has to stop there. It doesn’t.
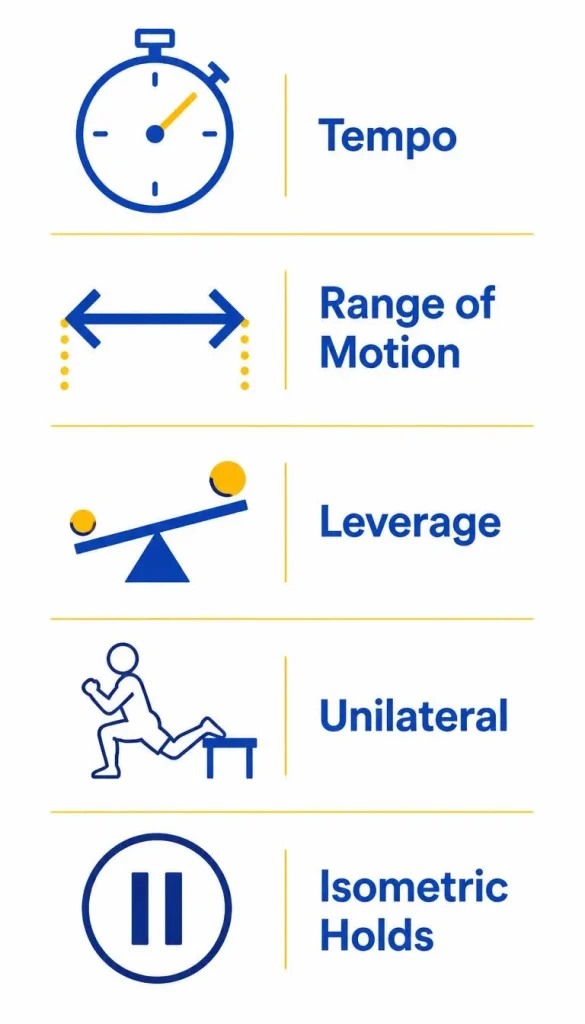
Weight is just one of several ways to make an exercise harder. Tempo, range of motion, leverage, and training one limb at a time can all increase the demand on your muscles without adding a single pound to what you’re lifting. This guide (progress home workouts without heavier weights) walks through each of these tools and how to apply them to the exercises you’re already doing.
Quick Answer
When you’ve maxed out your available weights, you can keep progressing by slowing down the tempo of each rep (especially the lowering phase), increasing the range of motion through a fuller stretch or deeper position, changing the leverage of an exercise to make your own bodyweight harder to move, and shifting from two-limb exercises to one-limb (unilateral) versions. None of these require new equipment, and combined, they offer months of genuine progression potential even with a fixed, limited set of weights.
Why Weight Isn’t the Only Lever for Progress
Progressive overload — the gradual increase in demand placed on a muscle over time — is the underlying principle behind nearly all strength progress. Adding weight is the most direct way to apply it, but it’s one tool among several, not the whole toolkit (what progressive overload actually means and how it applies in practice).
When weight is fixed, the muscle doesn’t know the difference between “heavier weight” and “the same weight made harder through tempo, range of motion, or leverage.” What matters to the muscle is the overall demand of the set — and all of the methods below increase that demand in a genuine, trainable way. This is especially relevant for home training, where the practical ceiling on available weight is usually reached long before the body’s actual capacity for further progress.
Method 1: Tempo (Controlling the Speed of Each Rep)
Tempo refers to how fast or slow you move through each phase of a rep — lowering (eccentric), the pause at the bottom, lifting (concentric), and the pause at the top. Slowing down, particularly the lowering phase, increases how long the muscle stays under tension during a set.
How to apply it:
- Count a 3-4 second lowering phase on exercises like squats, push-ups, and rows, instead of lowering quickly.
- Add a 1-2 second pause at the hardest point of the movement (the bottom of a squat, the bottom of a push-up) before reversing direction.
- Keep the lifting phase controlled rather than explosive, unless you’re specifically training power.
What the evidence actually shows: Slower tempo increases total time under tension, but research doesn’t show it automatically produces greater strength or muscle growth than a moderate tempo. A controlled study comparing a 4-second lowering phase to a 2-second lowering phase found substantially more time under tension with the slower tempo, but no meaningful difference in strength gains, and only a small, isolated difference in growth for one specific muscle (tempo and time-under-tension research on strength and hypertrophy outcomes). In practical terms, that means tempo is genuinely useful as a tool for increasing difficulty and improving control and technique with the weight you already have — not a guaranteed shortcut to faster results. Its real value for home training is that it makes a fixed weight feel meaningfully harder, which is exactly the problem this guide is solving.
Method 2: Range of Motion (Going Deeper or Fuller)
Many people unintentionally shorten their range of motion over time, especially as an exercise starts to feel easy. Deliberately increasing range of motion is a legitimate way to increase difficulty without changing the weight.
How to apply it:
- Squats: Lower until your hips drop below knee level (if mobility allows comfortably), rather than stopping at a partial squat.
- Push-ups: Lower until your chest is close to the floor, rather than stopping halfway.
- Rows: Allow your arms to fully extend at the bottom and pull all the way back at the top, rather than using a shortened, quicker range.
- Lunges: Lower until your back knee is close to the floor, rather than a shallow dip.
A fuller range of motion typically increases the muscle’s stretch under load, which adds difficulty and may support better long-term development than a shortened range at the same weight. Increase range of motion gradually, particularly for mobility-limited joints like the hips and ankles, rather than forcing a deeper position before your body is ready for it.
Method 3: Leverage (Changing How Your Bodyweight Loads the Muscle)
Leverage changes alter how much of your bodyweight the target muscle has to move, without changing the exercise’s basic pattern. This is one of the most underused tools in home training.
Examples of leverage progressions:
| Exercise | Easier Leverage | Harder Leverage |
|---|---|---|
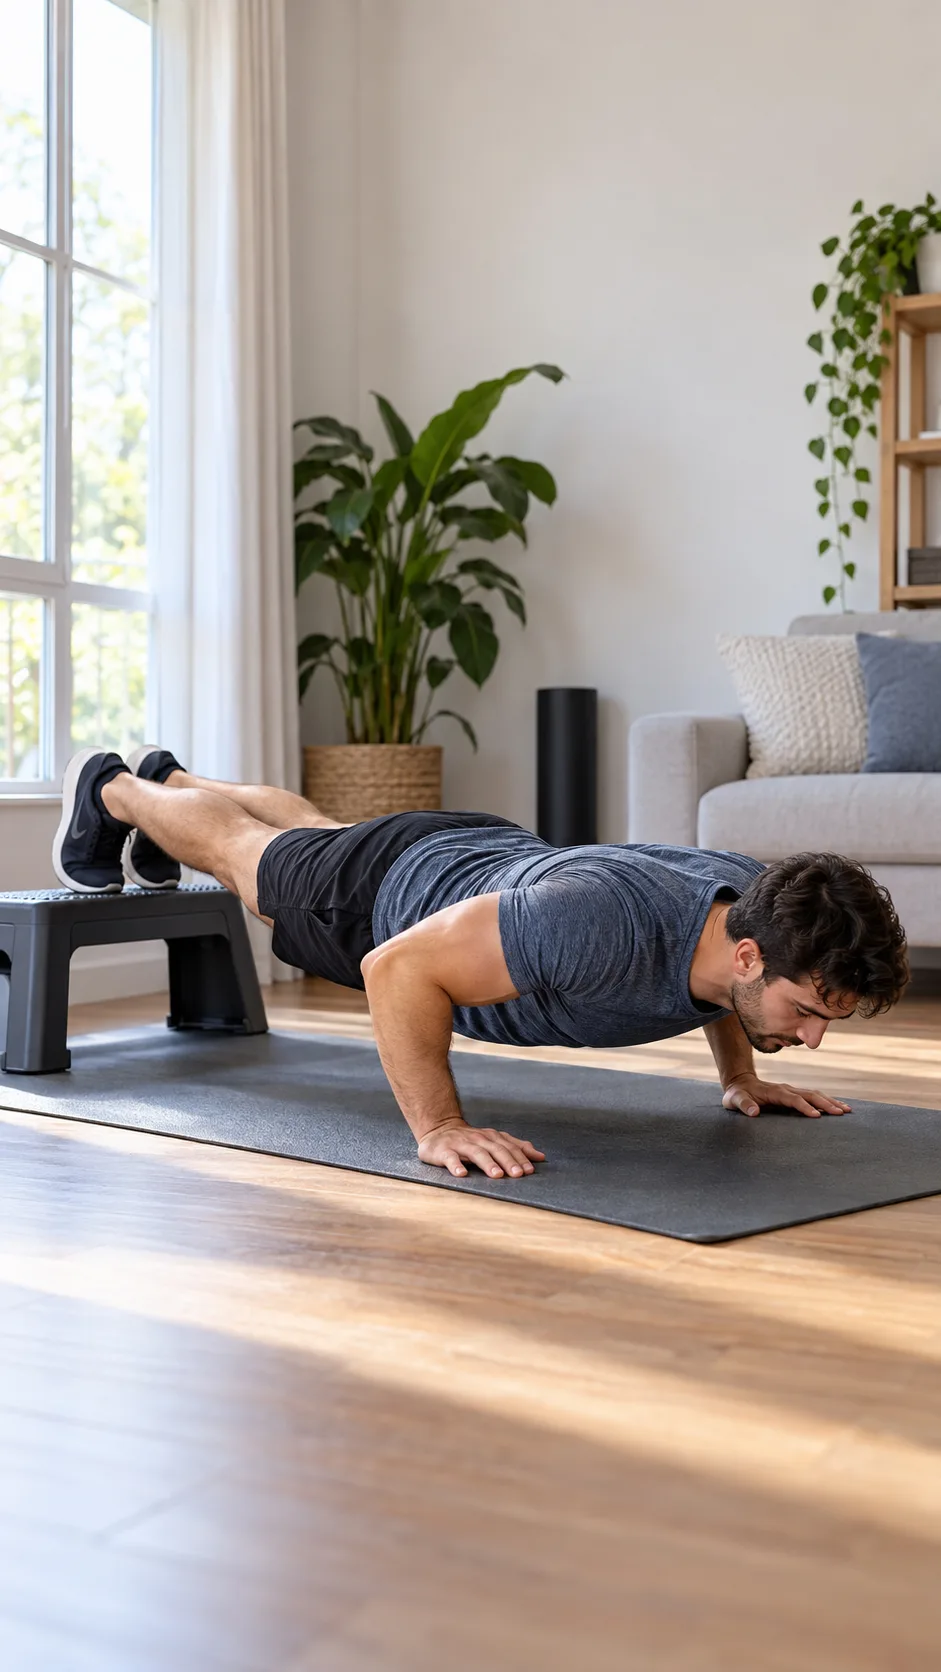
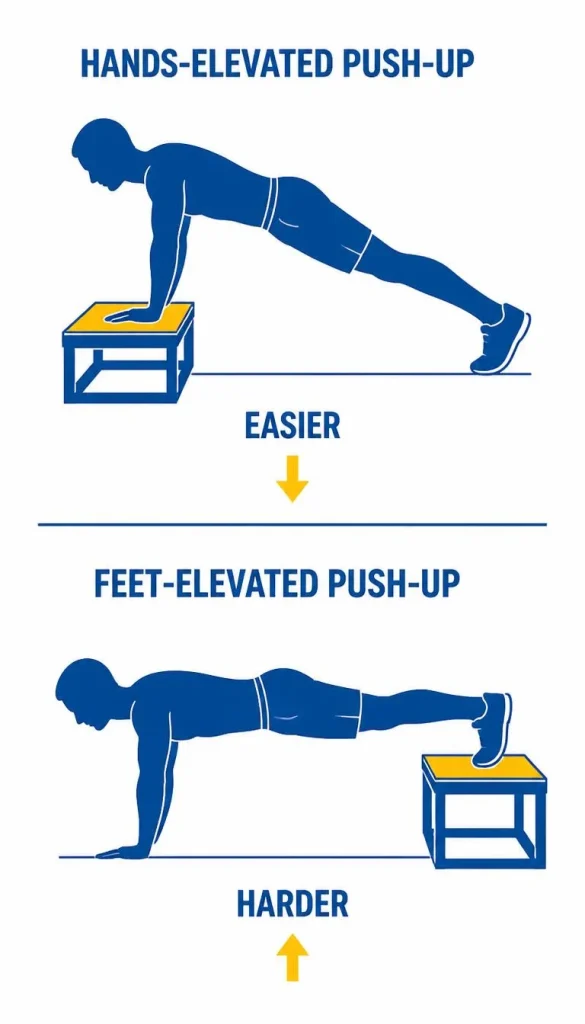
| Push-up | Hands elevated on a table or counter | Feet elevated on a chair or step |
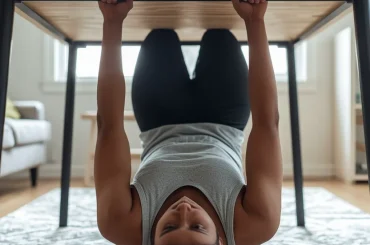
| Row (table/bar) | Knees bent, feet close to body (more vertical) | Legs straight, feet far from anchor (more horizontal) |
| Squat | Holding onto something for balance/assistance | Single-leg (pistol squat progression) or slow tempo |
| Plank | On forearms and knees | On forearms and toes, or with a leg lifted |
| Glute bridge | Both feet on the floor | Single-leg glute bridge |
The underlying idea is simple: the more horizontal your body is relative to the floor during a pushing or pulling movement, the more of your bodyweight the target muscle has to control. Elevating your feet during a push-up, for example, shifts more load onto your chest and shoulders without adding any external weight.
Method 4: Unilateral Training (One Limb at a Time)
Switching from a two-limb version of an exercise to a one-limb version is one of the most effective ways to add difficulty using nothing but your own bodyweight, because the working limb now has to manage the entire load alone instead of sharing it.
Common unilateral progressions:
- Bodyweight squat → Bulgarian split squat → single-leg squat (pistol squat progression)
- Push-up → single-arm-assisted push-up (one hand on a raised surface) → closer-to-single-arm push-up
- Glute bridge → single-leg glute bridge
- Row → single-arm row (with a resistance band or any available weight)
Unilateral training has an additional practical benefit beyond difficulty: it can reveal and help correct strength imbalances between your left and right sides that bilateral (two-limb) exercises can mask, since a dominant side often compensates for a weaker one during two-limb movements. If you’re also building out pulling exercises specifically, this progression approach applies directly to rows and other back-focused movements covered in FitVibe’s guide to training your back at home.
Progress unilateral exercises gradually — a single-leg squat, in particular, requires significant balance, ankle mobility, and strength, and jumping to it too quickly is a common source of frustration. A split squat or elevated-rear-foot variation is a reasonable intermediate step for most people before attempting a full single-leg squat.
Method 5: Isometric Holds (Pausing at the Hardest Point)
Isometric holds — pausing in a static position without moving — are related to tempo but worth treating as their own tool, since they target a specific point in the movement rather than slowing the whole rep.
How to apply it:
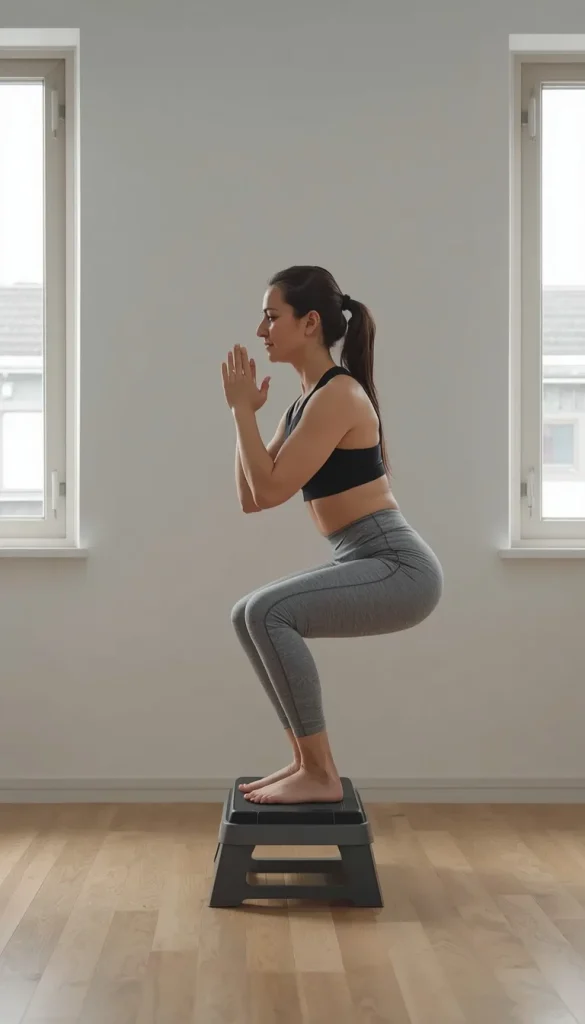
- Squats: Hold at the bottom of the squat (or at parallel) for 10-30 seconds before standing back up, or hold between reps.
- Push-ups: Hold a few inches above the floor at the hardest point of the movement for several seconds.
- Planks: A static hold is already isometric by nature; progress by extending hold time or moving to a harder leverage variation (toes instead of knees, a leg lifted).
- Wall sits: A classic isometric hold for the legs that needs no equipment at all.
Isometric holds are particularly useful for building control and confidence at a specific sticking point in a movement — for example, holding the bottom of a squat can help someone who struggles with depth or stability build comfort there before adding tempo or unilateral work on top.
Combining These Methods: A Sample Progression
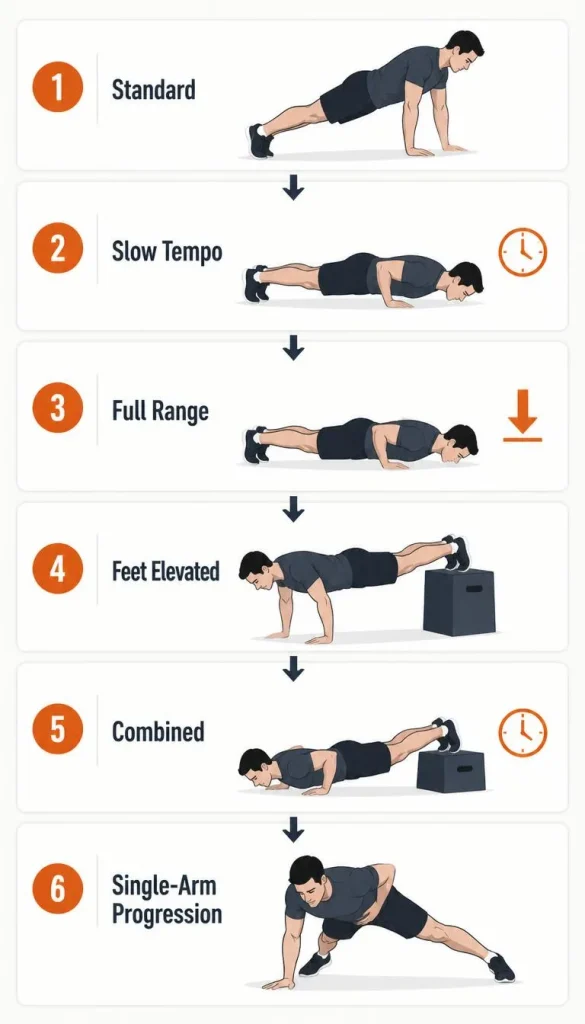
Here’s how these tools stack together over time using a single exercise — the push-up — as an example, assuming you don’t have access to a heavier external weight.
| Stage | Modification | What Changed |
|---|---|---|
| 1 | Standard push-up, moderate tempo | Baseline |
| 2 | Standard push-up, 3-second lowering phase | Tempo increased difficulty |
| 3 | Standard push-up, full range of motion, chest near floor | Range of motion increased difficulty |
| 4 | Feet-elevated push-up | Leverage increased difficulty |
| 5 | Feet-elevated push-up, slow tempo, full range | Combined tempo + leverage + range |
| 6 | Single-arm-assisted push-up progression | Unilateral loading increased difficulty |
This same pattern — tempo first, then range of motion, then leverage, then unilateral (with isometric holds layered in wherever a specific sticking point needs extra attention) — works across most bodyweight exercises (squats, rows, lunges, planks) and can realistically provide progressive challenge for months without needing any new equipment.
When These Methods Aren’t Enough: Adding Resistance Bands
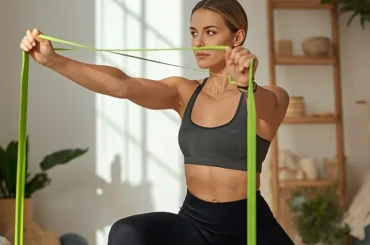
Tempo, range of motion, and leverage changes have real limits — eventually, some exercises genuinely need more external resistance than bodyweight manipulation alone can provide, especially for larger muscle groups like the legs and back. Resistance bands are a low-cost, space-efficient way to add that resistance without buying heavier dumbbells, and they pair naturally with everything in this guide, since you can still apply tempo and range-of-motion adjustments to banded exercises. See FitVibe’s full guide to resistance band workouts at home for exercises covering every major muscle group.
How to Track Progress Without a Heavier Weight to Chase
One underrated challenge of bodyweight progression is that it’s less obvious to track than simply writing down a heavier number on a weight log. A few practical ways to keep tabs on real progress:
- Log the modification, not just reps and sets. Note which tempo, range of motion, leverage, or unilateral variation you used for each exercise, so you can see the actual progression path over weeks, not just rep counts.
- Track reps in reserve. If a set that used to leave you with only 1-2 reps left in the tank now leaves you with 4-5, that’s a genuine sign of improved capacity, even at the same bodyweight difficulty level.
- Note how a previously hard variation feels. If a feet-elevated push-up that used to be a struggle now feels controlled, that’s a clear signal to add the next progression layer.
- Revisit video occasionally. Recording a set every few weeks (even on a phone) can reveal improved range of motion, control, and stability that aren’t always obvious from how a set simply felt.
This kind of structured tracking fits naturally into a broader, realistic approach to home training — the same principle behind building a sustainable routine around a busy schedule rather than expecting a single dramatic indicator of progress every week.
Common Mistakes When Progressing Without Heavier Weights
| Mistake | Why It’s a Problem | Better Approach |
|---|---|---|
| Assuming progress has stopped once a weight feels easy | Leads to plateaus and lost motivation unnecessarily | Apply tempo, range of motion, or leverage changes before assuming you need new equipment |
| Rushing to the hardest unilateral variation too soon | Risk of poor form, frustration, or minor injury from inadequate balance/strength | Use intermediate steps (like split squats before single-leg squats) |
| Slowing tempo so much that form breaks down | Defeats the purpose and can increase injury risk | Choose a controlled tempo you can maintain with good form throughout |
| Changing multiple variables at once without a plan | Makes it hard to tell what’s actually driving progress or difficulty | Introduce one progression method at a time, then combine once each feels manageable |
| Sacrificing range of motion to lift explosively | Reduces the actual training stimulus despite feeling more impressive | Prioritize full, controlled range of motion over speed in most training contexts |
Before-You-Progress Checklist
- [ ] Confirm your current exercise is being performed with full range of motion before adding other progressions
- [ ] Introduce one progression method (tempo, range, leverage, or unilateral) at a time
- [ ] Master an intermediate step before attempting the most advanced unilateral variation
- [ ] Track which modification you’re using for each exercise so you can see what’s actually changing over time
- [ ] Reassess every 1-2 weeks and add the next progression once the current one feels controlled, not just completed
Real-World Examples
Only have light dumbbells (5-10 lbs): Combine the dumbbells with a slow tempo and fuller range of motion on exercises like goblet squats and rows, then progress to single-arm or single-leg variations as those start to feel manageable.
No weights at all, bodyweight only: Rely primarily on leverage changes (elevated push-ups, single-leg work) and tempo, since these can meaningfully increase difficulty without any equipment at all.
Returning after a long break: Start with standard tempo and range of motion at a comfortable level before introducing leverage or unilateral changes, since rebuilding a movement pattern safely takes priority over maximizing difficulty immediately.
Frequently Asked Questions
How do I know when it’s time to apply one of these progression methods? A practical sign is when you can complete your target reps and sets with several reps still feeling easy to spare (commonly described as having a high number of “reps in reserve”). At that point, your current setup is no longer providing enough challenge, and it’s a reasonable time to introduce tempo, range of motion, leverage, or a unilateral variation.
Is slow tempo training actually better for building muscle? Not necessarily. Research comparing a slower eccentric tempo to a moderate one found no meaningful advantage for overall strength or muscle growth, despite significantly more time under tension with the slower tempo. Tempo is best understood as a tool for making a fixed weight feel harder and improving control, rather than a technique proven to accelerate results on its own.
Are unilateral exercises harder than they look? Often, yes, especially at first. Working one limb at a time removes the ability of a stronger side to compensate for a weaker one, and it also demands more balance and stability than most people expect from an otherwise familiar exercise.
Can I combine tempo, range of motion, leverage, and unilateral training in the same workout? Yes, though it’s usually more manageable to introduce one progression method at a time per exercise rather than changing everything at once. Once each modification feels controlled individually, combining them (as shown in the push-up progression example above) is a reasonable next step.
Will these methods eventually stop working too? Eventually, yes, for some exercises, particularly larger lower-body and back movements where significant external resistance becomes necessary for continued strength gains. At that point, resistance bands or additional weight become the more practical path forward, though tempo, range of motion, and leverage changes can still be layered on top of added resistance.
Do I need any special equipment to use these progression methods? No. Tempo, range of motion, and leverage changes require no equipment at all. Unilateral progressions typically only need a stable surface (a chair, step, or sturdy table) for balance or elevation, which most homes already have.
How long should I spend on each progression stage before moving to the next one? This varies by individual, but a rough guide is 2-4 weeks per stage, or until the current variation consistently feels controlled with several reps in reserve rather than maximally difficult. Moving too quickly through stages — especially into unilateral or isometric progressions — increases the risk of poor form outweighing the benefit of added difficulty.
Safety Notes
Stop any exercise immediately if you experience sharp pain, dizziness, or unusual shortness of breath. Increase range of motion gradually, especially for the hips, knees, and ankles, rather than forcing a deeper position before your mobility supports it. Progress unilateral exercises in stages — jumping directly to advanced single-limb variations before you have adequate balance and strength is a common source of minor injury. If you have an existing joint condition or injury, consider checking with a doctor or physical therapist before significantly changing your range of motion or adding unilateral loading to affected joints.
Conclusion
Running out of heavier weights doesn’t mean running out of ways to progress. Tempo, range of motion, leverage, and unilateral training each offer a genuine, trainable way to increase difficulty using only your own bodyweight and the equipment you already have. Applied one at a time and combined gradually, these tools can realistically support meaningful progress for months before external resistance becomes a genuine limiting factor. The underlying habit worth building isn’t a specific trick — it’s the mindset of treating your current equipment as a flexible starting point rather than a hard ceiling, and recognizing that control, range of motion, and balance are just as trainable as raw strength.
Save This Guide: Quick Reference
- Tempo: Slow the lowering phase (3-4 seconds), add a pause at the hardest point
- Range of motion: Go deeper/fuller before adding other progressions
- Leverage: Elevate feet (push-ups), extend lever length (rows), reduce support (squats)
- Unilateral: Move from two-limb to one-limb versions gradually, using intermediate steps
- Isometric holds: Pause at the hardest point of a movement (10-30 seconds) to target sticking points
- Progression order: Master full range of motion first, then layer tempo, leverage, and unilateral changes one at a time
- When bodyweight methods run out: Resistance bands are the next practical step for continued progress